Welcome back, my aspiring cyber warriors!
This series is intended to provide the aspiring cyber warrior with all the information you need to function in cyber security from a network perspective, much like my “Linux Basics for Hackers” is for Linux.
In this tutorial we will address Server Message Block or SMB. Although most people have heard the acronym, few really understand this key protocol. It may be the most impenetrable and least understood of the communication protocols, but so critical to the smooth functioning of your network and it’s security.
What is SMB?
Server Message Block (SMB) is an application layer (layer 7) protocol that is widely used for file, port, named pipe and printer sharing. It is a client-server communication protocol. It enables users and applications to share resources across their LAN. This means that if one system has a file that is needed by another system, SMB enables the user to share their files with other users. In addition, SMB can be used to share a printer over the Local Area Network (LAN).
SMB over TCP/IP uses port 445.
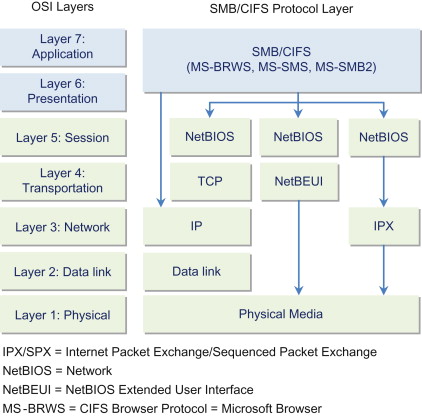
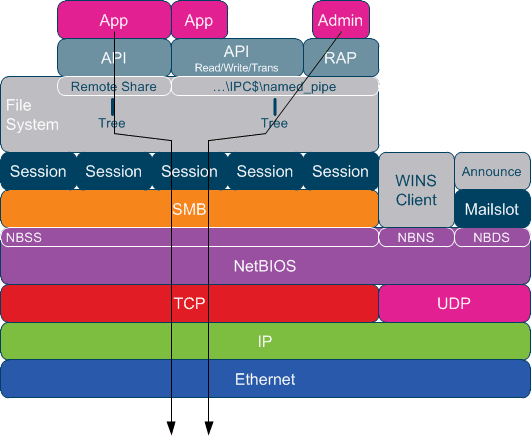
SMB is a client-server, request response protocol. The diagram below illustrates the request-response nature of this protocol. Clients connect to servers via TCP/IP or NetBIOS. Once the two have established a connection, the clients can send commands to access shares, read and write files and access printers. In general, SMB enables the client to do everything they normally do on their system, but over the network.
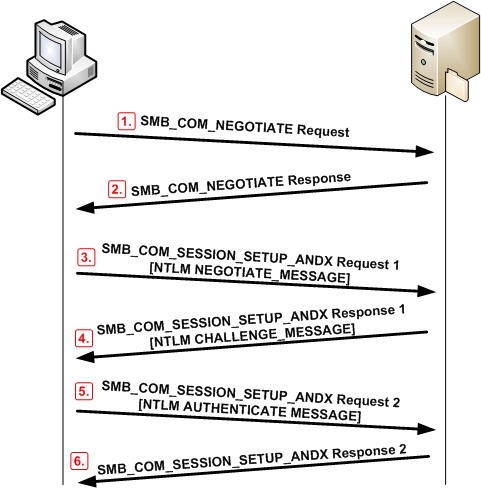
SMB was first developed by IBM in the 1980’s (the dominant computer company from the 1950’s through the mid 1990’s) and then adopted and adapted by Microsoft for its Windows operating system
CIFS
The term CIFS and SMB are often confused by the novice and cyber security professional alike. CIFS stands for “Common Internet File System.” CIFS is a dialect or a form of of SMB. That is, CIFS is a particular implementation of the Server Message Block protocol. It was developed by Microsoft to be used on early Microsoft operating systems.
CIFS is now generally considered obsolete as it has been supplanted by more modern implementations of SMB including SMB 2.0 (introduced in 2006 with Windows Vista) and SMB 3.0 (introduced with Windows 8 and Server 2012).
Vulnerabilities
SMB in Windows and Samba in Linux/Unix systems (see below) has been major source of critical vulnerabilities on both these operating systems in the past and will likely will continue to be a source of critical vulnerabilities in the future. Two of the most critical Windows vulnerabilities over the last decade or so, have been SMB vulnerabilities. These include MS08-067 and more recently, the EternalBlue exploit developed by the NSA. In both cases, these exploits enabled the attacker to send specially crafted packets to SMB and execute remote code with system privileges on the target system. In other words, armed with these exploits, the attacker could take over any system and control everything on it.
For a detailed look at the EternalBlue exploit against Windows 7 by Metasploit, see my tutorial here. In addition, using Metasploit, an attacker can set up a fake SMB server to capture credentials.
In addition, the Linux/Unix implementation of SMB, Samba, has had its own problems as well.
Although far from a complete list of vulnerabilities and exploits, when we search Metasploit 5 for smb exploits we find the considerable list below.
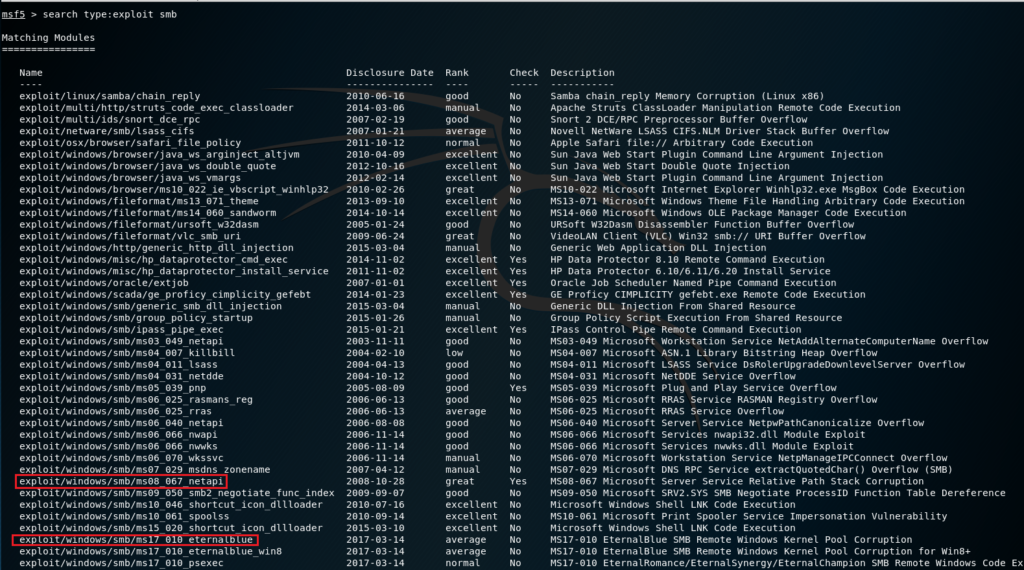
Note the highlighted infamous MS08-067 exploit responsible for the compromising of millions of Windows Server 2003, Windows XP and earlier systems. Near the bottom of the list you can find the NSA’s EternalBlue exploit (MS17-010) that the NSA used to compromise untold number of systems and then–after its release by Shadowbrokers–was used by such ransomware as Petya and WannaCry.
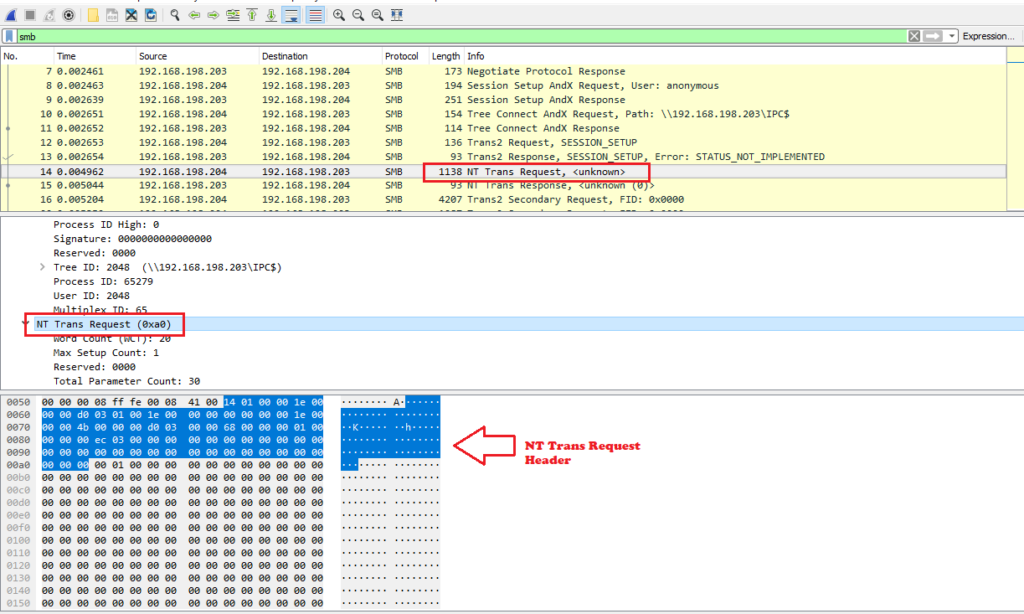
In the Network Forensics section here at Hackers-Arise, I have detailed packet-level analysis of the EternalBlue exploit against SMB on a Windows 7 system.
Samba
While SMB was originally developed by IBM and then adopted by Microsoft, Samba was developed to mimick a Windows server on a Linux/UNIX system. This enables Linux/UNIX systems to share resources with Windows systems as if they were Windows systems.
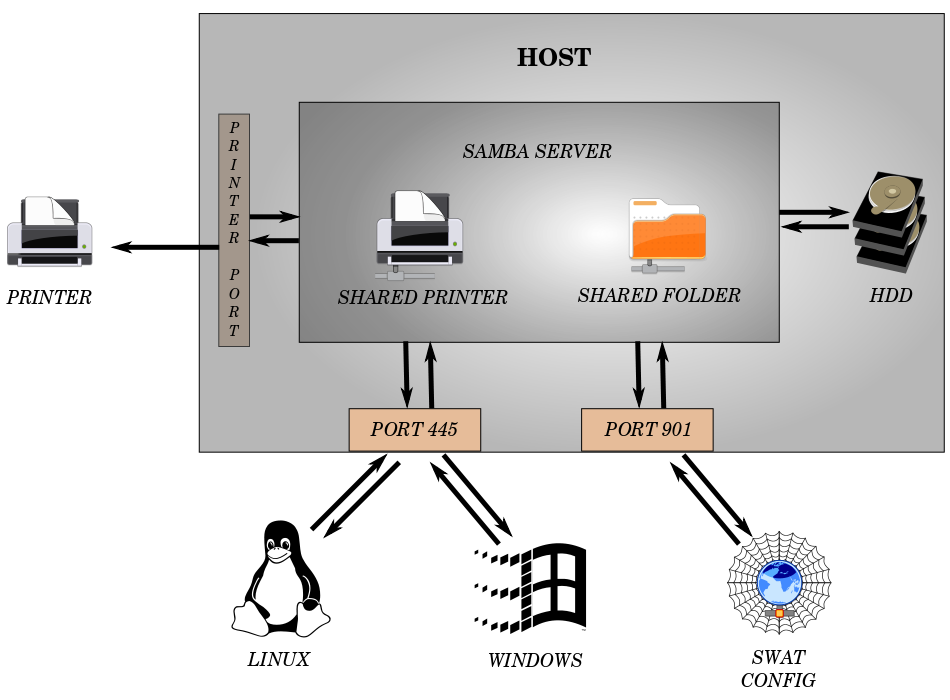
Sometimes the best way to understand a protocol or system is to simply to install and implement it yourself.
Here, we will install, configure and implement Samba on a Linux system. As usual, I will be using Kali–which is built upon Debian– for demonstration purposes, but this should work on any Debian system including Ubuntu and usually any of the vast variety of *NIX systems.
Step #1: Download and Install Samba
The first step, if not already installed, is to download and install Samba. It is in most repositories, so simply enter the command;
kali > apt-get install samba
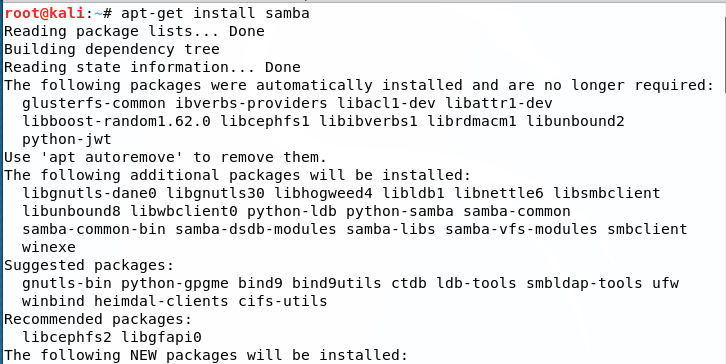
Step #2: Start Samba
Once Samba has been downloaded and installed we need to start Samba. Samba is a service in Linux and like any service, we can start it with the service command.
kali > service smbd start
Note that the service is not called “Samba” but rather smbd or smb daemon.
Step #3: Configure Samba
Like nearly every service or application in Linux, configuration can be done via simple text file. For Samba that text file is at /etc/samba/smb.conf. Let’s open it with any text editor.
kali > leafpad /etc/samba/smb.conf
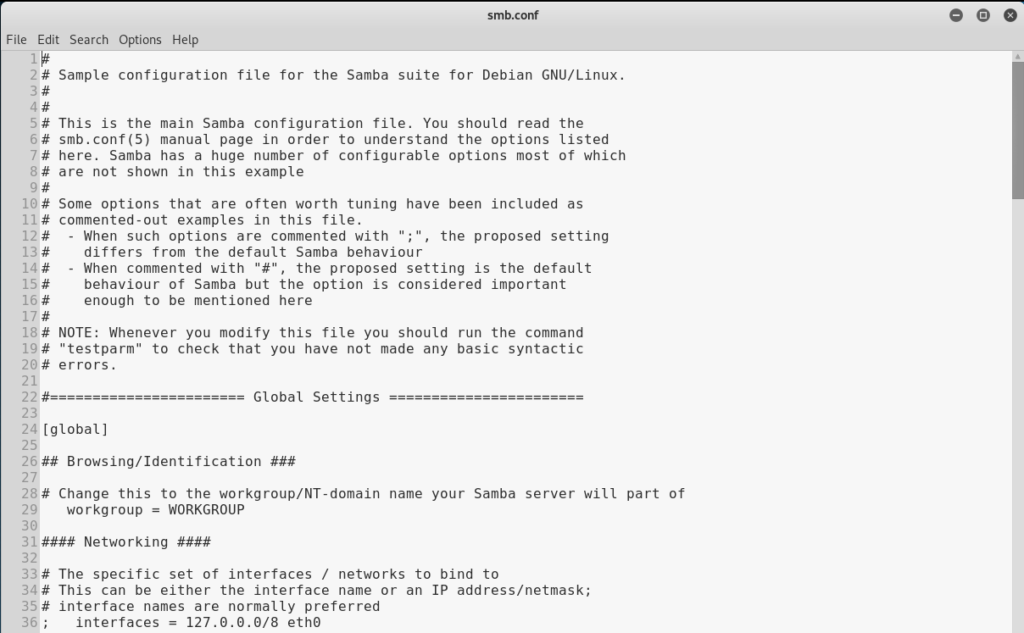
We can configure Samba on our system by simply adding the following lines to the end of our configuration file.

In our example, we begin by;
naming our share [HackersArise_share];
providing a comment to explain comment = Samba on Hackers-Arise;
provide a path to our share path = /home/OTW/HackersArise_share;
determine whether the share is read only read only = no;
determine whether the share is browsable browsable = yes.
Note that the share is in the user’s home directory (/home/OTW/HackersArise_share) and we have the option to make the share “read only”.
Step #4: Creating a share
Now that we have configured Samba, we need to create a share. A “share” is simply a directory and it’s contents that we make available to other users and applications on the network.
The first step is to create a directory using mkdir in the home directory of the user. In this case, we will create a directory for user OTW called HackersArise_share.
kali > mkdir /home/OTW/HackersArise_share
Once that directory has been created, we need to give every user access to it by changing its permissions with the chmod command.
kali > chmod 777 /home/OTW/HackersArise_share
Now, we need to restart Samba to capture the changes to our configuration file and our new share.
kali > service smbd restart
With the share created, from any Windows machine on the network you can access that share by simply navigating via the File Explorer to the share by entering the IP address and the name of the share, such as;
\\192.168.1.101\HackersArise_share
Conclusion
SMB is a critical protocol on most computer systems for file, port, printer and named pipe sharing. It is little understood and little appreciated by most cyber security professionals, but it can be critical vulnerability on these systems as shown by MS08-067 and the NSA’s EternalBlue. The better we understand these protocols, the better we protect our systems from attack and compromise.
