Welcome back, my hacker novitiates!

With this lab, we will conduct recon on a SCADA target using port scanning and nmap scripts. Up until this point we have used passive recon using Shodan and Google dorks, but now we will be using a more active approach to find SCADA systems and do some active reconnaissance to get more information before we develop or decide upon an exploit.
Nmap is one of those tools that is essential to every hacker/penetration tester’s toolbox. No hacker/pentester should EVER be without nmap. Although nmap has many varied capabilities ( including nmap scripts (NSE)), it began as a simple best port scanner and has remained the best port scanner available to us. As a result, every hacker/pentester should understand the basics of using nmap.
Nmap Basics
When we can boil down the nmap syntax for port scanning to its bare essentials, it looks like this;
nmap -s<type of scan> <IP address>
Pretty simple, right?
nmap has many types of scans. Among the most useful and popular are;
T – this is the connect scan. It opens a TCP 3-way handshake with the target system, thereby offering us the most reliable results, but the least stealthy, as the 3-way handshake is logged by the system.
S – the stealth or SYN scan sends a packet with the SYN flag set thereby opening a connection, but not completing the 3-way handshake. Therefore, it is not logged, but it is pretty reliable.
U – the T and the S scans provide us with information on the TCP ports, but not the UDP ports. This scan specifically looks for UDP ports.
X – the infamous XMAS scan. It turns on the P, U, and F flags and it used to be able to illicit a response from some systems. Although still famous, it has limited usefulness now.
A – this scan sets the ACK flag which would normally indicate an ongoing TCP communication. It can be used to confuse and get past some stateless firewalls.
The Most Reliable, but Least Stealthy Scan
Let’s start by attempting a -T or Connect scan against a SCADA target. I have chosen this one from my Shodan search for systems running port 502 or modbus (modbus is the most popular SCADA protocol). This just happens to be a plant in Genoa, Italy.
kali > nmap -sT 88.147.125.34 -p 502

As you can see, nmap found port 502 filtered on this system. This usually indicates that the port is enabled, but has a firewall blocking access.
Sometimes, a UDP scan can reveal more information. Let’s try a nmap UDP scan against the same target and see whether it reveals any further information. The switch for a UDP scan is -sU.
kali > nmap -sU 88.147.125.34 -p 502

We can see that this scan comes back saying that port 502 is either open or filtered.
Nmap scripting engine (NSE)
In addition to being an excellent port scanning tool, nmap has a scripting capability. This adds significant capability to nmap via the Lua scripting language.
The Nmap scripting engine is one of Nmap’s most powerful and, at the same time, most flexible features. It allows users to write their own scripts and share these scripts with other users for the purposes of networking, reconnaissance, exploitation, etc. These scripts can be used for:
Network discovery
More sophisticated and accurate OS version detection
Vulnerability detection
Backdoor detection
Vulnerability exploitation
Find the Nmap Scripts
From the terminal, let’s look for the Nmap scripts. All of the scripts should end in .nse (nmap scripting engine), so we can find the scripts by using the Linux locate command with the wildcard *.nse. That should find all files ending in .nse, such as;
kali > locate *.nse

As you can see in the screenshot above, our terminal displays hundreds of nmap scripts.
The basic syntax for running these scripts is this:
nmap –script <scriptname> <script-args-if-any> <host ip>
In our case here, we want to use a specific script for finding modbus nodes within a modbus enabled sites (although SCADA sites use numerous different protocols, modbus is the most popular). In other words, if we know that the site is using modbus, this script can discover each of the nodes and their identifier.
Outside of the standard syntax, we need to add the script argument ‘modbus-discover.aggressive=true’ to our command. The command should look something like this.
kali > nmap –script modbus-discover.nse –script-args=’modbus-discover.agressive=true’ -p 502 88.147.125.34

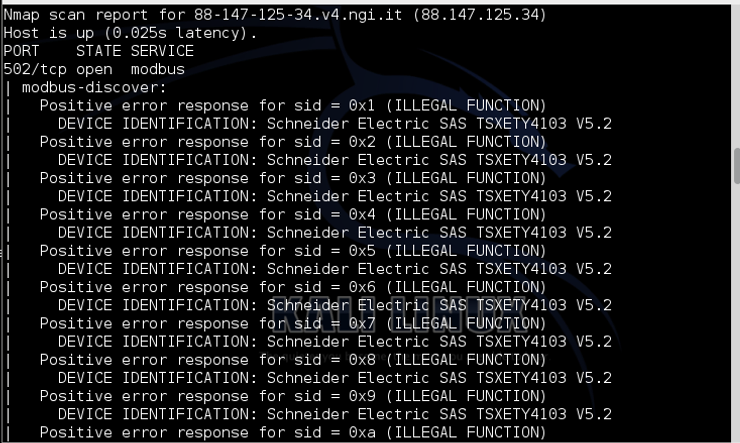
When we run it and it is successful, it should be able to provide us an output of all the modbus nodes on the system.


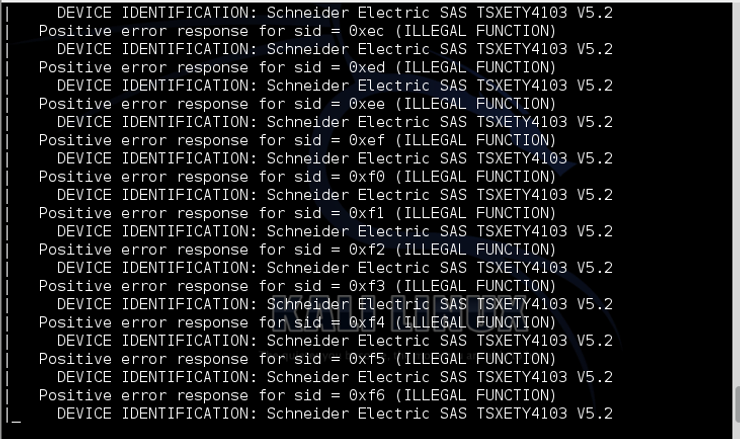
As you can see, it successfully was able to identify the nodes as Schneider Electric SAS version 5.2 and found each of the nodes.
It found nodes from 1 (0x01) to 262 (0xf6). This provides valuable information to the attacker by not only identifying the PLC and the version, but also the communication protocol (modbus) and each of the nodes. As SCADA attacks require intimate knowledge of the ICS operations, this information may be enough for the attackers to begin planning their attack upon this infrastructure.
SCADA infrastructure is among the valuable and vulnerable systems in the world. If one of these systems is hacked (as many have) it can not only cost the company millions of dollars, but may cost many lives as well (e.g. electric grid, water treatment). We have been able to not only find these devices, but also enumerate each of its nodes, setting up the exploitation of these devices and systems.
Keep coming back as we explore more ways to discover and exploit these SCADA systems!


