In the first two parts of this series, we captured a forensically sound image of the hard drive or other storage device and an image of the RAM. In this tutorial, we will recover any files deleted by the suspect.
Among the most fundamental skills necessary for a forensic investigator, recovering deleted files is probably the most basic. As you know, files that are “deleted” remain on the storage medium until overwritten. Deleting these file simply makes the cluster available to be overwritten. This means that if the suspect deleted evidence files, until they are overwritten by the file system, they remain available to us to recover.
In this lab, we will be using the open-source The Sleuth Kit (TSK) for identifying and recovering deleted files. The Sleuth Kit was first developed for Linux, but has now been ported for Windows, so we will be using it with our Windows examination system. A GUI interface was developed for TSK named Autopsy that we will be using in this tutorial.
Install it on your system.
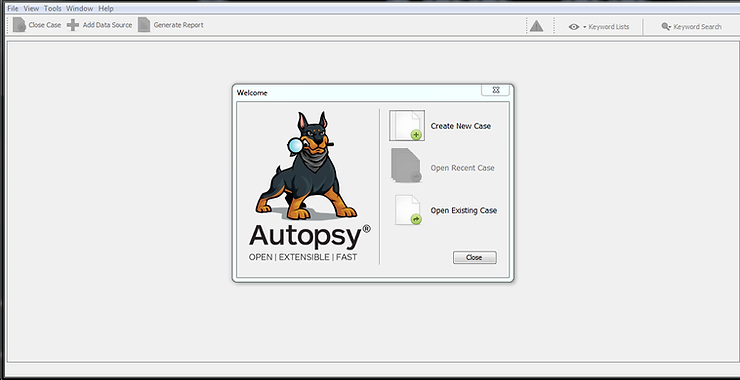
After installing Autopsy then starting it, you will be greeted with a screen similar to the above.
Click “Create New Case“.
When you do, you will be greeted by a new window asking you to name your new case and what directory you want to place your cases. Enter “New Case 101” and put it in the base directory of C:\Cases.
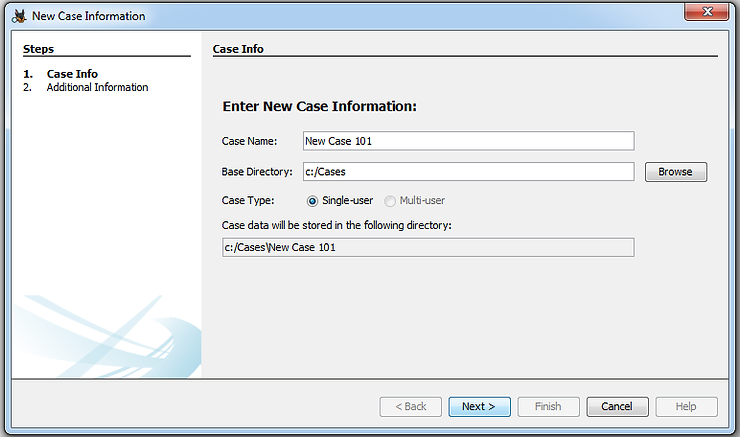
Now, hit Next.
This will open another window asking you for a case number and the examiner name. Give it a case number of 101 and your name or initials for the examiner.
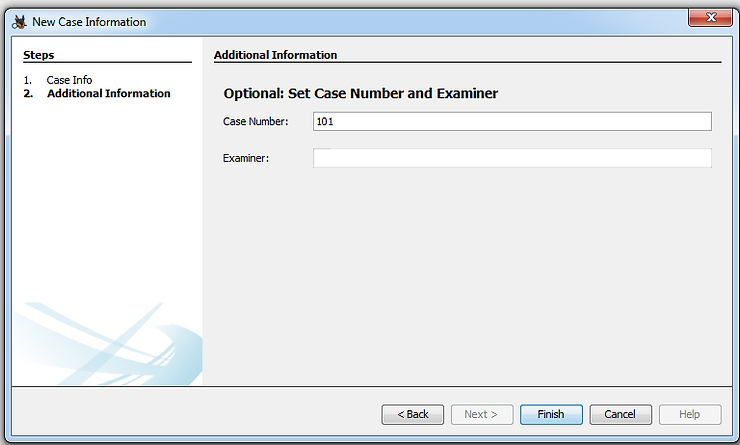
Click “Finish“.
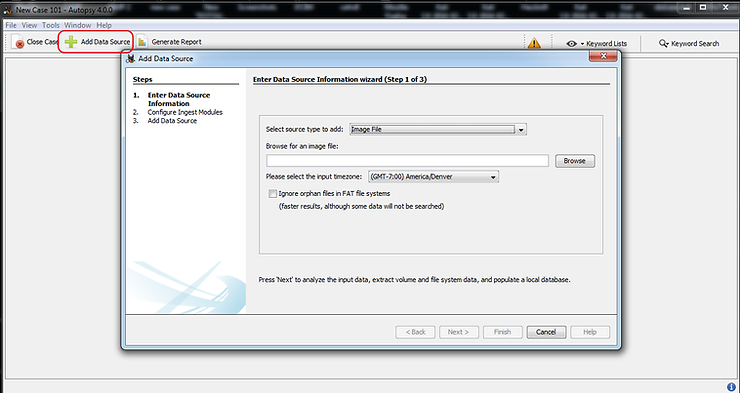
Next, click on “Add New Data in the upper left corner. When you do, a “Add Data Source” window will open. Since we will be using the image file created in the previous module, select “Image File” and then Browse for the image file you created in Module 1. I saved mine in a directory c:\forensic images. Yours may be different.
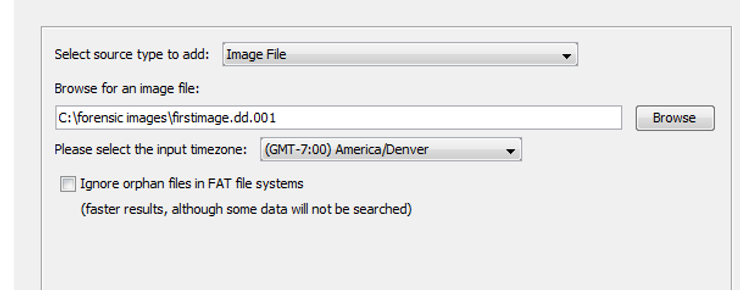
Now, add our first.image.dd.001 image from the first tutorial in this series.
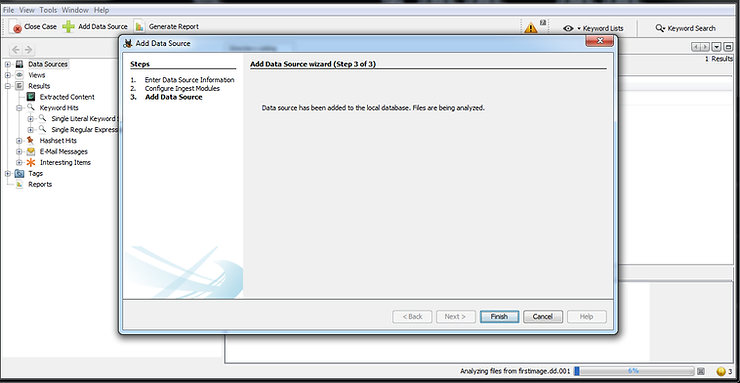
After adding the image click next and Autopsy will begin to do its analysis of the image. Eventually, you will greeted by a screen like that below.
Click “Finish“.
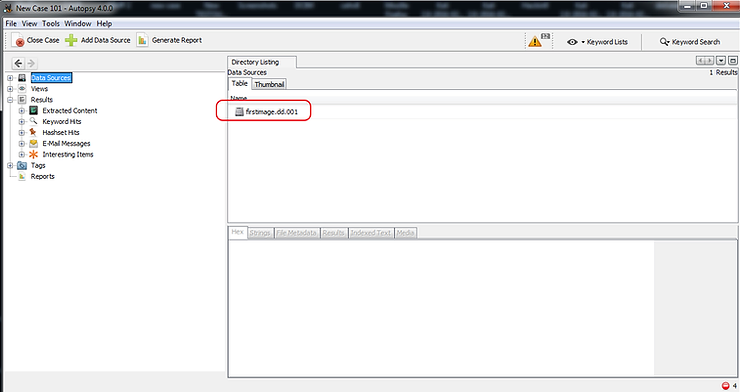
Now, you should see an interface like that below. Note that your “firstimage.dd.001” should appear as your data source.
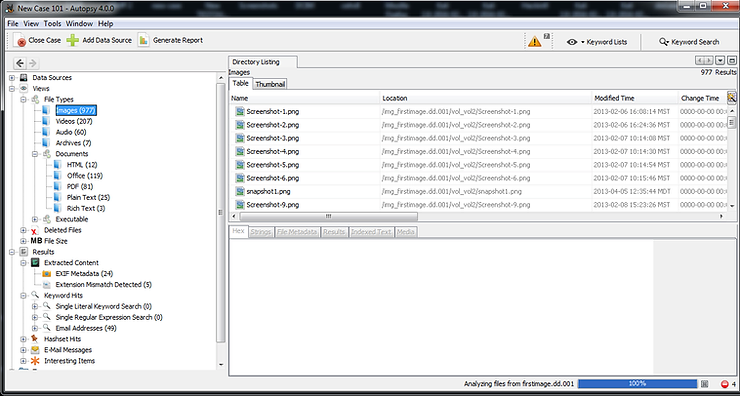
If we expand the “File Types” in the object explorer, Autopsy will display all the file types and the number of files in each category. Below you can see I clicked on the “Images” file type and Autopsy will display all the Image files.
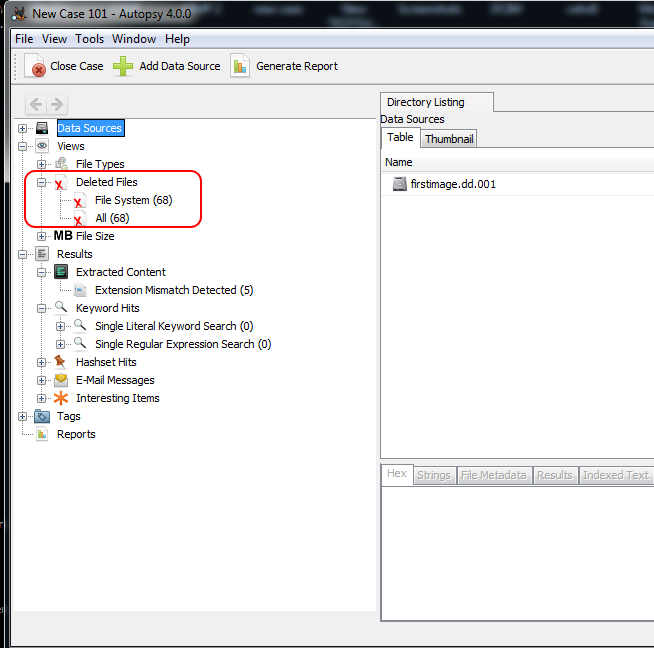
A little further below in the object explorer, we can see a File Type named “Deleted Files”. When we click on it will display all the deleted files.
When we click on a deleted file, we can do some analysis in the lower right window. There you will see tabs labeled, Hex, Strings, File Metadata, Results and Indexed Text. In this case, click on the “File Metadata ” tab and it will display the file’s metadata including the name, type, size, modified, accessed and created (MAC).
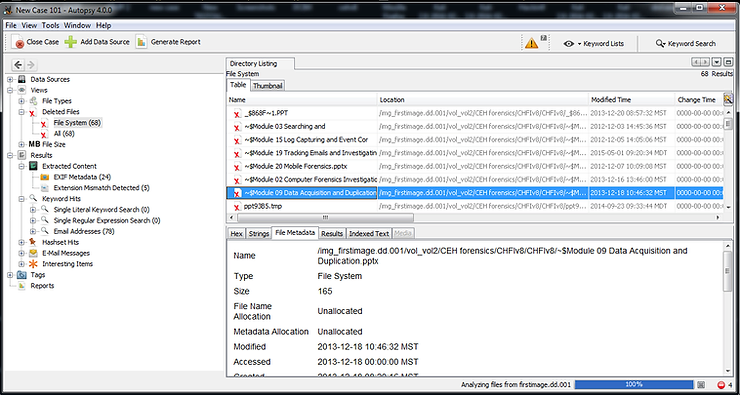
Now, to recover the deleted file,right click on the deleted file and select “Export”. This will open a window like that below.
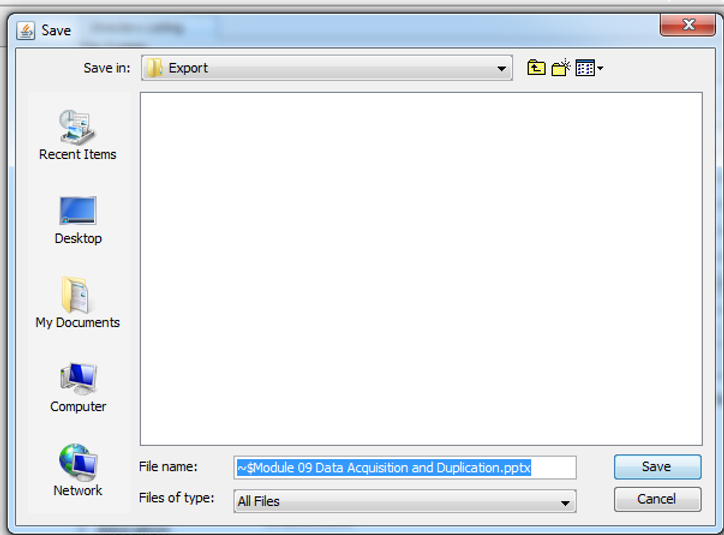
Go ahead and save the deleted file into the Export sub-directory.
To find the exported/deleted file, navigate to;
C:\Cases\New Case 101\Export

You can now double click on that file to open it in the appropriate application.
Conclusion
Suspects will often attempt to cover their tracks by deleting key evidence files. We know as a forensic investigator that until those files are overwritten by the file system they can be recovered. With tools such as Autopsy and nearly every other forensic suite (Encase, ProDiscover, FTK, Oxygen, etc.) recovery of these deleted files is trivial.
