In the previous article in this series, we built a sophisticated, low-interaction SCADA honeypot with conpot. In this article, we will now test that Honeypot to see what it looks like to an outside attacker. It’s critical that our HoneyPot look and act like an authentic SCADA system, if we are to be successful in enticing attackers to to honeypot.

Let’s use some SCADA hacking/pentesting tools to test how our honeypot would appear to an outside attacker.
Step #1 Scan with nmap
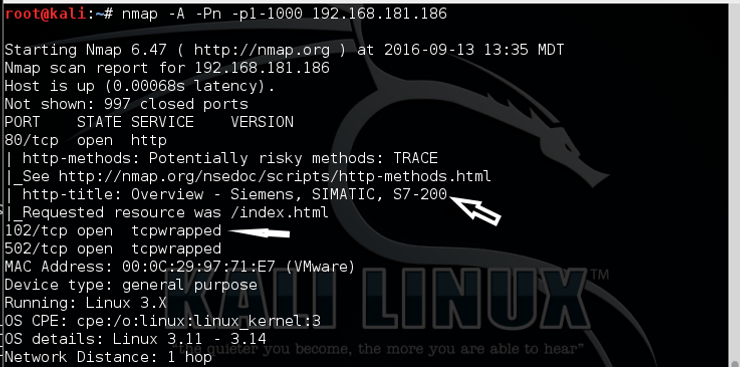
First, let’s scan it with nmap. Start up your Kali system. Then, let’s use nmap with the -A switch to collect information about its services.
kali> nmap -A -Pn -p1-1000 192.168.181.186

As you can see in the screenshot above, nmap found port 80 open, but also was able to identify the Siemens SIMATIC S7-200. It also found the tcpwrapped ports 102(S7-200) and 502 (modbus) open.
To find whether any UDP port were open or more specifically port 161 for SMNP, we can use an nmap script, snmp-sysdescr.
kali > nmap -sU -p161 192.168.181.186 –script snmp-sysdescr

In this case, it found UDP port 161 open and identified it as snmp.
Step #2 Metasploit Scan on the Honeypot
As you know, there are numerous auxiliary and exploit modules designed for SCADA systems in Metasploit. Let’s take a look at a few here and test them on our Honeypot.
First, let’s use the modbusdetect module. This module is designed to determine whether modbus is running on the target.
To start the module type;
kali > use auxiliary/scanner/scada/modbusdetect
Then, we need to set the remote host (RHOST) IP address and then exploit.


As you can see above, this scanner identified that modbus was running on the Honeypot. So far, so good. It’s looks like a authentic SCADA system.
Next, let’s look at the modbus_findclientid module. This module is designed to enumerate the client ID’s on the SCADA system.
To start it, type;
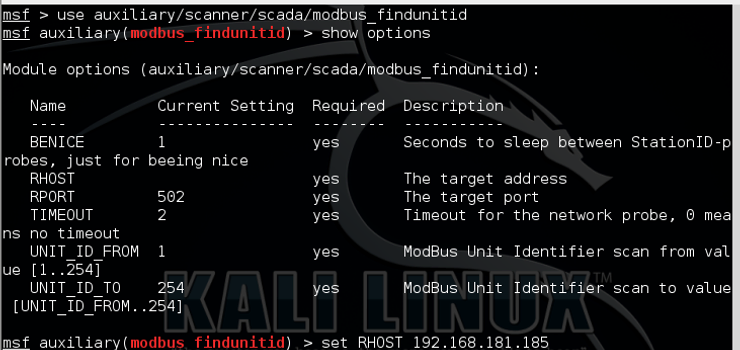
kali> use auxiliary/scanner/scada/modbus_findunitid
Then;
kali> show options

Note, that we only need to set the RHOST for this scanner.
kali > set RHOST 192.168.181.185

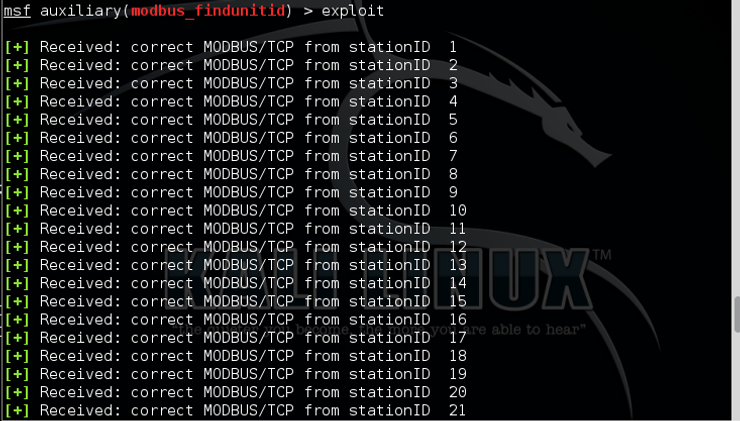
When we type exploit, we can see that this scanner will begin to enumerate the stationID of each client on the system.
Lastly, let’s use the modbus client module to write data to a coil. This module will enable us to write data to the modbus client coils or registers. As you can imagine, this could wreak havoc on a SCADA system as it could enable or disable the PLC’s or alter their function.
Type;
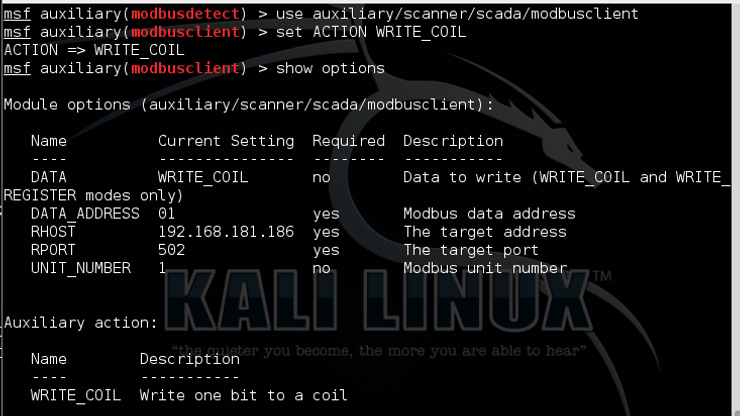
kali > use auxiliary/scanner/scad/modbusclient

This module requires that we select the ACTION WRITE_COIL or WRITE REGISTER. In addition, we need to select the UNIT_NUMBER (the client ID) and finally, the data we want to send to the coil or register. Since we will be sending data to the coil here, we can only select 0 or 1 (de-activate or activate).
Finally, we type run.

As we can see in the screenshot above, we have successfully altered the data on the selected coil. As you can imagine, we can go through each coil and change its data.
As you can see, the conpot SCADA honeypot we built appears and reacts just like an authentic SCADA system!
Step #3 Monitoring the Honeypot
Ideally, the honeypot should have some type of intrusion/security monitoring system like Snort, Splunk, Suricata or others. Without these, we can still monitoring activities through standard Linux monitoring tools such as;
/var/log/syslog – contains all the messages except the authentication related ones. By analyzing few, I found only kernel and thermald messages. Each line contains: datetime, hostname, program that generated the message, process id and log message.
/var/log/auth.log – contains system authorization information including user logins through display and login managers, sudo access requests, authentication mechanism for crontab, policykit system daemon etc. This log file is found on Debian Linux distributions, but some other use /var/log/secure instead.
/var/log/btmp – keeps track of failed login attempts. It is a binary file and can be read using last command.
/var/log/dpkg.log & /var/log/yum.log – contain messages about installs or upgrades for various package managers


