When we are trying to find vulnerabilities in a website to attack, we need a solid web server vulnerability scanner. Internet-facing web apps can open enormous opportunities for us as they are often riven with vulnerabilities and can often offer an entry point to the internal network and resources.
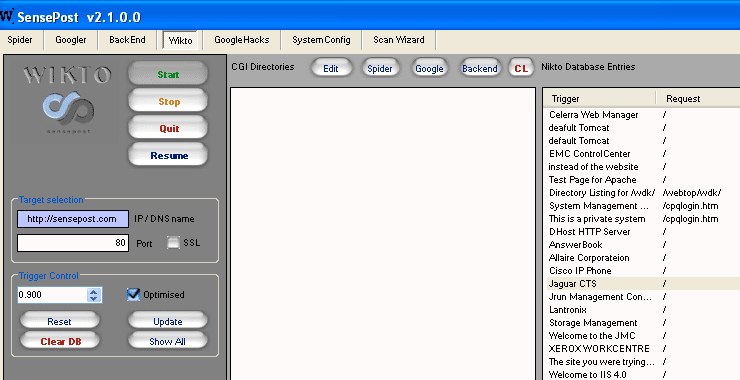
Previously, I had showed you how to use Nikto in Kali to find website vulnerabilities, but here I will show you a Windows-based tool called Wikto that includes all of the capabilities of the command-line Nikto Perl script, but with an easy-use GUI and extended features.
The Many Benefits of Wikto
Vulnerabilities in various web scripts are discovered on a regular basis, and Wikto can help you find such flaws on your target. This tool was written by Sensepost, a security services firm based in South Africa.
Like Nikto, Wikto searches for thousands of flawed scripts, common server mis-configurations, and unpatched systems. Wikto adds HTTP fingerprinting technology to identify web server types based on their protocol behaviors, even if administrators purposely disguise web server banner information to deceive attackers.
What’s more, attackers are increasingly turning to well-crafted Google searches to look for vulnerable sites. Security researcher Johnny Long maintains the Google Hacking Database (GHDB) list of more than 1,000 Google searches that can locate vulnerable systems and files. Wikto can import the latest GHDB vulnerability list, and then query Google for such holes in your target domain.
In addition, Wikto is capable of querying the back-end of the website to find directories and files. In this way, we can get an idea of what directories and files are behind the website and what to hack to find confidential or hidden data.
Finally, Wikto can spider the website and find all of the links embedded in the site.
Now, let’s get started with Wikto!
Step 1: Download Wikto
As mentioned above, Wikto was developed from the Linux nikto for Windows by Sensepost and given additional capabilities that are not found in nikto itself. The folks at Sensepost have given it an excellent and relatively easy-to-use GUI, and you can download it here.
Step 2: Open Wikto
When we click on Wikto, we are greeted by the following screen. To start, we need to choose which services of Wikto we want to use first. Let’s begin with the Wikto tab near the center of the top menu bar. This the vulnerability scanner based upon Nikto.
Step 3: Wikto-ing
To begin Wikto-ing (scanning for vulnerabilities), we first need to load the nikto database. Remember, nikto is a website vulnerability scanner and we need to load the signatures of the vulnerabilities. Along the left side bar we see a button labeled “Load Nikto Database”. Click on it to load Wikto with the nikto database.

Once the database has been loaded, we can begin our scan of the target database. Here I will be scanning the webscantest.com website, so I put it in the target selection in the left-hand side menu bar. I could have chosen to use the IP address, but since my DNS sever is functioning properly, I’ll just use the domain name.
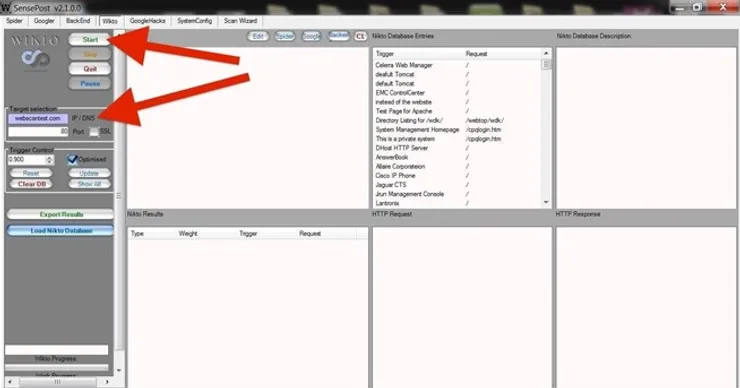
Notice that Wikto loads the nikto database into the center column. These are the commands that wikto will run against the website looking for known vulnerabilities. Start the vulnerability scan by clicking on “Start” at the top of the left-hand menu bar.
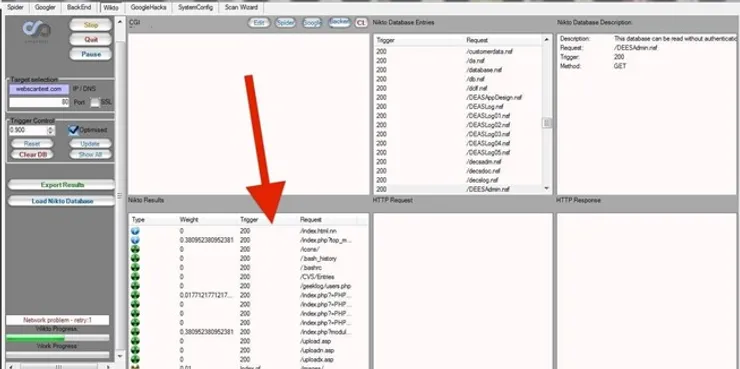
Wikto begins to scan the website for known vulnerabilities, just like nikto, and places the list of vulnerabilities in the lower left side window as seen below.
Step 4: Google Hacking
Wikto also has automated Google hacking built in. Google hacking is the ability to use the huge database compiled by Google of nearly every page on the web to find vulnerabilities and hidden files. It relies upon special keywords and syntax that enable us to extract these pages from Google’s database.
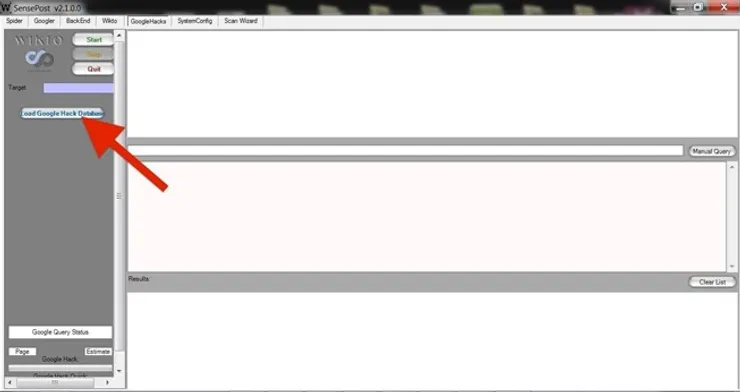
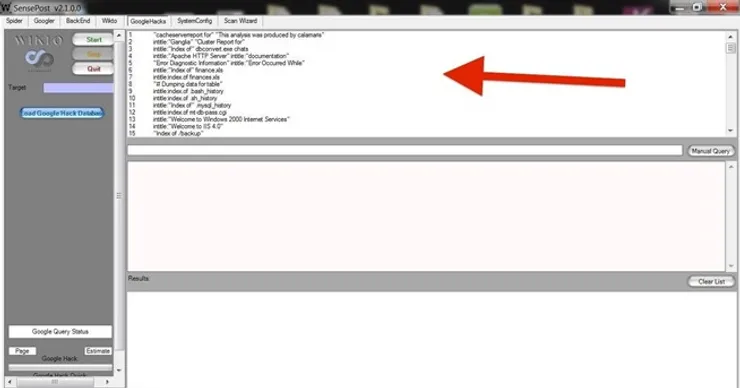
When you click on the “Load Google Hack Database”, it populates the upper window with over 1,400 Google hacks that attempt to find key information about the website that may be helpful in hacking it.
Step 5: Backend Discovery
This feature of Wikto enables you to find nearly every backend directory and file in the website. By trying to connect to a database of common directories and files and gauging the websites response (201 if it exists and 401 if it doesn’t), Wikto is able to find what directories and files that exist behind the frontend site. This can be critical for various hacks and possibly directly traversal to find confidential or hidden files on the website.
To run this feature, simply click on the “BackEnd” tab on the top tool bar and then click “Start” at the top of the left menu bar. When you do, Wikto will populate the three columns. Then click on “Start” again and Wikto will begin to try to find the enumerated directories and files.
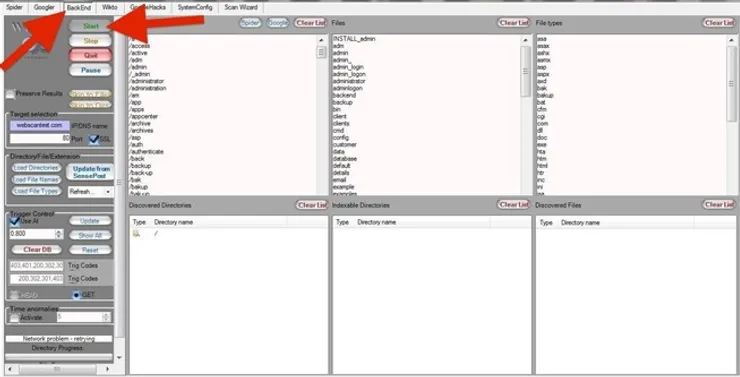
Be patient. This process can take hours, but it is worth it as you will have nearly every directory and file on the back-end of the website.
As you can see in the screenshot below, Wikto has begun the process of identifying the back-end directories and is listing those in the bottom left window named “Discovered Directories”. It has also found an indexable directory and eventually, will find files and list them in the “Discovered Files” window.

Step 6: Spidering the Website
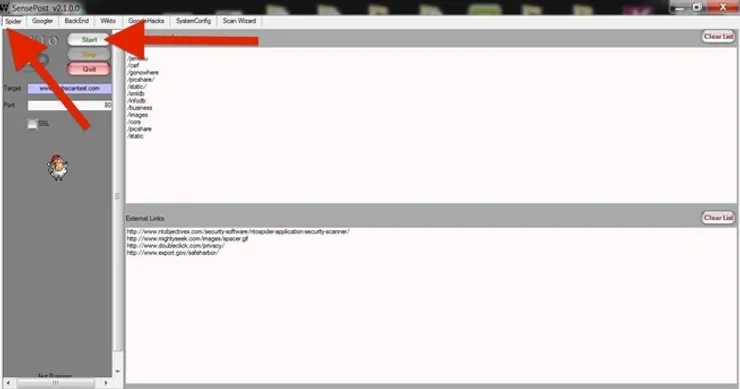
Finally, Wikto can be used to spider a website to find all the links embedded within. Click on the “Spider” tab to the far left of the top menu bar and then click on the “Start” button on the left menu bar. Below, I have spidered webscantest.com and the external links are displayed in the lower window.
Wikto is one more tool in our hacking toolbox to help us gather information and find vulnerabilities in web applications. For those of you still using Windows, Wikto is the nearly perfect tool for web app hacking, and for those of you using Linux, Wikto is one of those few tools that makes it worthwhile keeping a copy of Windows available in a VM or dual boot.
