In many cases when a computer, phone, or mobile device is seized for evidence, the system will have graphic images that might be used as evidence. Obviously, in some cases these graphic images may be the evidence such as in child pornography cases. In other situations, the graphic images may tell us something about where and when the suspect was somewhere specific.
Most digital devices “stamp” information on these graphic images that can tell us a lot about the who, what, when, and where the pictures were taken. This information is known as EXIF data and can very often be useful to the forensic investigator.
EXIF Data
Exchangeable image file format (EXIF) is a standard set by the digital camera industry to identify formats for digital images and sound files. This information includes camera settings, time, date, shutter speed, exposure, whether a flash was used, compression, the name of the camera, and other information critical to viewing and editing the image in image-editing software. This information can also be useful to the forensic investigator.
Originally developed for JPG and JPEG file formats, some other formats use EXIF data as well, but this data is not available for PNG and GIF image file types.
There are numerous graphic formats. These include:
PSD
JPEG
BMP
TIFF
PNG
GIF
BPG
JFIF
and many, many more
There are numerous applications that can extract this EXIF data from graphic files. Nearly everyone of the major forensic suites (EnCase, FTK, Oxygen, etc.) has this capability built in. For this lab, we will be using a simple, Windows-based tool called ExifReader (free).
Step 1: Install ExifReader
Once you have downloaded ExifReader, click on the executable and it will open a clean and simple GUI like that below.

Now, simply click on the “Open” button and browse to the pictures on the system or media. JPEG and JPG contain the most information, so let’s use those.
Step 2: Open a Picture File
When you open the picture file with ExifReader, it will load the picture into the thumbnail to the left and display the EXIF data to the right down the page.

Note that the picture on the suspect’s computer was made with a Samsung phone, Model SCH-I535, and was taken on March 15th, 2014 at 11:04 a.m.
There is numerous other information in the EXIF data, but most is related to the technical specs of the camera and photography. Most of this is of limited value to the forensic investigator.
If the device had GPS enabled when the picture was taken, we would know the exact GPS coordinates of where the picture was taken.
Let’s try another picture. Once again, this will be a JPG file. When we open it, unfortunately the thumbnail does not appear. This happens with more than a few pictures, but the EXIF data is still displayed, even if the thumbnail doesn’t.
As you can see below, it tells us that the picture was taken by a Nikon camera, model E3100, on February 18th, 2007

Step 4: Extracting GPS Data
In this picture, we will look to see if we can extract the GPS data for the location of where the picture was taken.

When we extract the EXIF data from this picture, we find out it was taken with an Apple iPhone 4s on August 25th, 2011 at 9:27:36 a.m.
Near the bottom of the EXIF data we can find the GPS information, expressed in latitude and longitude, as this Apple iPhone had location services enabled. We can now take this data from the EXIF and put it into Google Maps or other mapping application to find the exact location where this picture was taken.

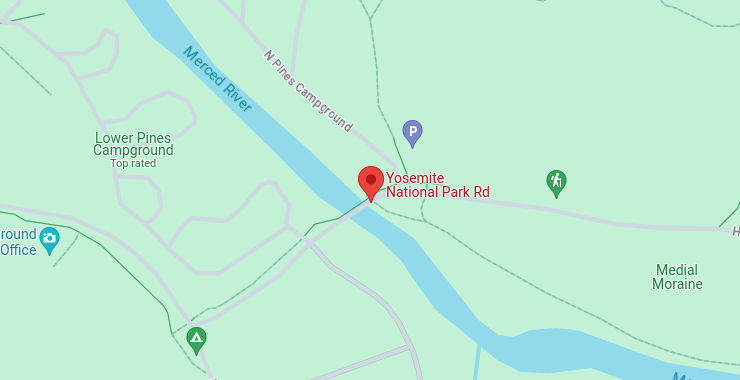
Google Maps reveals that this suspect took this picture in Yosemite National Park in California, USA.
When forensic investigators have graphic image files to work with, very often there can find useful information about the file and the suspect in the EXIF data. This information includes the camera manufacturer and type, the time the photo was taken, and maybe even the location where the photo was taken, all potentially useful information in a digital forensic investigation.


