Welcome back, my aspiring cyberwarriors!
Cryptography is one of foundational technologies of cybersecurity. It helps to keep our information safe, secure, and confidential. Without cryptography, anyone could read our messages or our stored data.
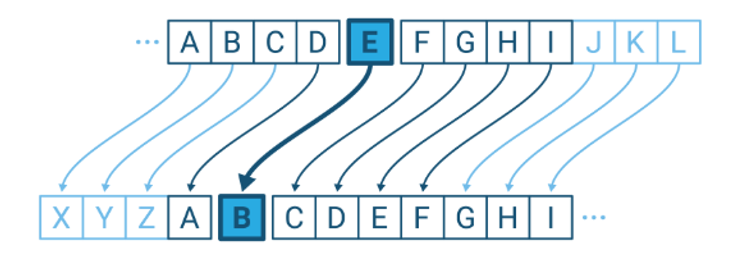
In our previous tutorial in Cryptography Basics, I described one of the oldest forms of cryptography, The Caesar Cipher. As you remember, this is a simple substitution cipher where one letter is replaced by another based a fixed number of shifts in the alphabet. In other words, if we were to use a Caesar Cipher with a shift of 4, every letter a would become an e and every b would be represented by an f and so one. In today’s world of super fast digital computers, such an encryption algorithm would be easily broken, but in Caesar’s time, it was very effective.
Of course, this shift could be positive or negative. For instance the diagram below shows a shift of -3 where an e is represented by a b.

To demonstrate both this encryption method and enhance your python skills, let’s try to write a python script that automatically encrypts our data with the simple Caesar Cipher.
Step # 1: Fire Up Your Kali and Open the Spyder IDE
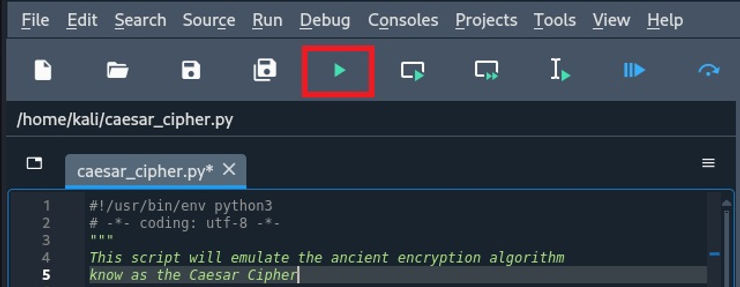
The first step of course is to fire up your Kali and open spyder IDE. You can download and install spyder
kali > sudo apt install spyder
Step # 2: Comments to Explain our Code
Now that we have kali and spyder open, we can begin to write our code.
Let’s begin by adding some comments to explain what we are about to do.
As you can see, spyder automatically places the proper interpreter in the first line and then places some simple comments detailing when the script was written. We want to add some additional comments about what we are about to do, write an encryption algorithm based upon the caesar cipher.

Next, let’s create a prompt for the user to input the message they want encrypted.
For simplicity sake, let’s convert all the text to lower case

secret_message_to_encrypt=input(“What is your secret message you would like to encrypt? >”)
Now that we have the input, let’s convert it to lower case using the lower method to keep our algorithm as simple as possible.
secret_message_to_encrypt = secret_message_to_encrypt.lower()
Lastly, in this first section, we initialize a variable named our_secret_message.
Step # 4: Encrypt the Message
In this next section, we will prompt the user for the number of letters to shift our message in the alphabet using our algorithm. In other words, how many letters forward or backward should the algorithm move each letter from the original input message.

shift = input(“what is the shift in your cipher? >”
Now, comes the good part. We will create a for loop that will grab each letter in the secret message for the encryption process until the script comes to the end of the message. We will need to convert each letter of the message into a digital representation known as ASCII.
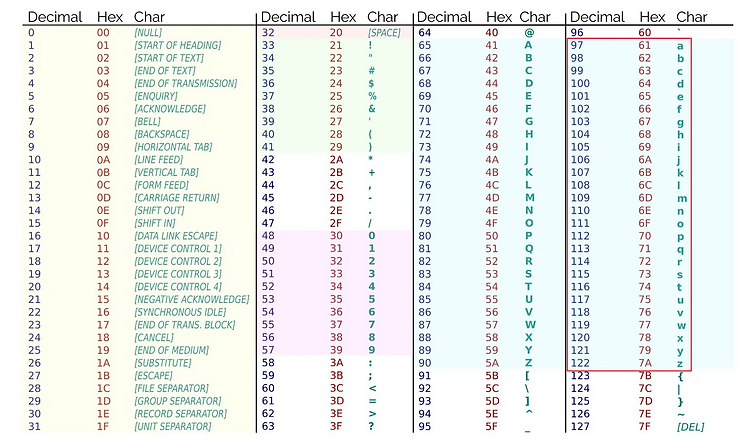
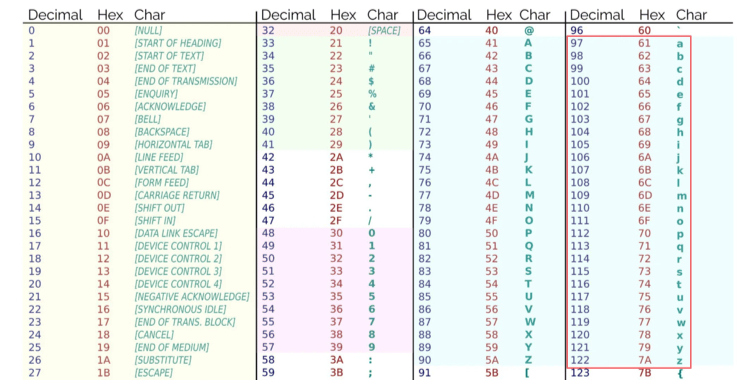
ASCII stands for American Standard Code for Information Exchange. It is simply a way to encode each character from our keyboard into a number that our computer can understand and do calculations on. You can see the standard ASCII table below.

On line #28 below, we can see the for loop grabbing each letter in the secret_message_to_encrypt.

It then uses ord function (the ord function converts a unicode character into its integer representation) to convert the letter to an integer and places it into a variable named ascii_num.
This variable will store the numeric representation of the letter.
ascii_num=ord(letter)
If the ascii_num is greater 97 and less than 122 (lower-case alphabetic characters), the algorithm proceeds to add the shift value (entered by the user’s input) to the ascii number of each letter of the user’s message. This then creates a new ascii number that we store as new_ascii.
This is the essence of our encryption.
new_ascii = ascii_num + int (shift)
In some cases, if the ascii_num is be greater than 122 we will need to subtract 26 to give it a new_ascii.

The algorithm then proceeds by concatenating each letter to our_secret_ message after converting back the ascii into a character using the chr function.
our_secret_message = our_secret_message + chr(new_ascii)
Finally, in the else statement, the ascii_num is converted into a character and appended to the our_secret_message

In the final step, the script prints “We have encrypted your message !” and then proceeds to print the encrypted message
Step # 5 Testing Our Script

When you do, the script begins to run and prompts the user for a message to encrypt such as:
Please help, Master OTW!

Here the user entered 5.
In the final step, the script prints the encrypted message that you see in the screenshot above.
Summary
Python is the favored language of cybersecurity for both its ease of use and a multitude of libraries and modules specific to our discipline. In addition, cryptography is a foundational technology that helps to keep our data safe and secure.
In this tutorial, we used to simple python to create an encryption algorithm similar to that used by the ancient Romans before the advent of digital computers. This simple script is meant to demonstrate some basic python to elucidate a simple encryption algorithm.
Look for my upcoming book, Python Basics for Hackers for more on Python.


