Welcome back, my aspiring cyber warriors!
Kali Linux is the operating system of choice for aspiring hackers and advanced hackers as well. Developed by Offensive Security, it contains many of the tools a hacker needs to get started. Recently, Offensive Security released a new version of Kali Linux nominally known as Kali Linux 2020.2. They have made some significant changes from earlier versions, so I want to update you here.
Step #1 Download the VM Image
Probably the best way to get started with Kali is to download and install the virtual machine (VM) image. This is simply the operating system already built to run in either Oracle’s VitualBox or VMWare Workstation. You can download the image here.

Note that there are images for both VMware and VirtualBox. Select the image appropriate for your virtualization system and download.
Step #2 Open the VM Image
The next step is to open the image. Since these virtual machines have already been built for you, there no need to create a new virtual machine. Simply select “Open” from the File menu and select the image from your download folder.

Then select the image and you should be ready to start Kali!

Once Kali starts, you should be greeted by a login screen like below. The default credentials for the username and password are “kali” and “kali”. Login into your new hacking platform!

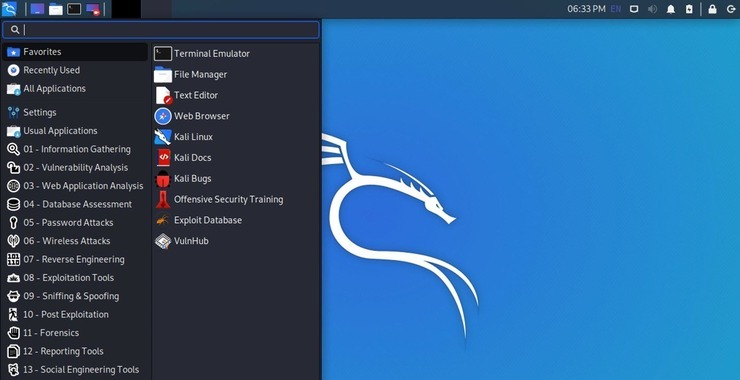
When you login, you will then see the new Kali Linux desktop.

Next, let’s open a terminal by clicking on the little terminal icon in the upper left corner.

This will open a terminal like that below.

Getting Started with Kali Linux
Before we begin our adventure into hacking, let’s take a brief moment to make certain everyone has some basic Linux skills.

Let’s begin with some of the most basic Linux commands.
For a more comprehensive look at Linux for Hackers, check out my “Linux Basics for Hackers” from No Starch Press available now at Amazon.
First a word about case-sensitivity. If you have worked you entire life/career in Windows, you may not be accustomed to case-sensitivity, as Windows is case-insensitive. On the other hand, Linux is case-sensitive. This means that the file “hacking” is different from the file “Hacking” and the directory “Desktop” is different from “desktop”.
In addition, the file structure in Linux is different than Windows. Whereas, Windows has physical drive, say C:, at the root of its file structure, Linux does not. At the top of the Linux file hierarchy is root /.

Since we will nearly always be working in the command line (CLI) in Linux, there are some key commands that are critical for just finding our way around. Probably the most important of these is ls.
kali > ls

The ls command will list all the files and sub-directories as seen above.
If we use the -l switch with the ls command, Linux will display much more information including the owner, group and security of the files and sub directories.
kali > ls -l

cd
Probably the second most commonly used command in Linux is cd or change directory.
autocomplete
Often, in Linux, final names and commands can be very long and complex. To resolve this issue, you can type the first few letters of a file or command and if you have enough characters to make it unique, you can tab and Linux will autocomplete it.
To copy a file from one location to another, we use the same command as Windows cp.
cp
While the copy command will make a copy of the file in the new location, the move mv will move the file to the new location and delete the previous file and location
mv
As we are moving around the command line we can often lose track of what directory we are in. To find what our present working directory is, we can use the pwd command.
pwd
As the root user, we can use any user’s account and it is advisable that we not use the root account when doing normal maintenance. As a result, we will not always be logged in as root. If we forget what user we are logged in as, we can ask the system “whoami”.
whoami
To list the contents of a file, we can use the cat command followed by the file name. While is useful for short files, for longer files it scrolls to the end the file before stopping. So, for a 1000 page file it will keep scrolling until it come sto page 1000. Not so useful.
more
The more command is used to display the contents of a file. It will display the first page and stop, unlike cat. You can then use the Enter key to scroll down through the file one line at a time or page down using the PGDN key. You exit by typing q to return to the command prompt.
When hacking or administering on Linux, we often need to see what processes are running. The command is ps
ps
Grep is a filter command. We can use grep to filter for any keyword.
grep
Sometimes an application or process will hang or zombie. To stop it we can use the kill command.
kill
As mentioned above, cat can be used to print a file to screen. Its useful for printing small files but of limited usefulness with large files. For our purposes in this class, cat can be useful for creating small text files. To create a text file with cat, simply type the command cat followed by the redirect > and then the name of the file you want to create such as;
kali > cat > hackingfile
Hacking is the most important skill set of the 21st century.
When you hit enter, cat will enter interactive mode and whatever you type next will be entered into the file. To exit and save, simply hit Cntl+d
Navigating Kali
As we will be using Kali as our primary means of attacking IT assets, it is important that we have an introduction and tour of Kali. For those of you who are new to Kali, please make certain that you spend adequate time familiarizing yourself with it and Linux, as it will pay dividends in the long run in this course and your career as a penetration tester. For those of you who already have significant experience with Kali and Linux, consider this a review and bear with us for just a moment.
Kali is a Debian distribution of Linux with a GNOME interface by default (if you are more comfortable with KDE or other interface, you can replace it, but I will be using the default interface in this course), built by Offensive Security and for offensive security. It has hundreds of tools built-in and is designed for hacking. Most of the tools we want to access and use can be found under the Kali Linux tab at the top of the screen. Let’s take a look at those.
Click on the Kali tab in the upper left corner to open a pull down menu.

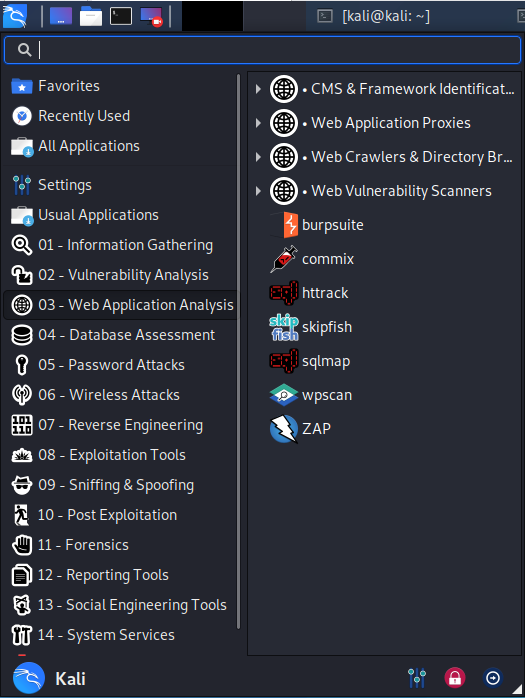
When we click on it, it expands to numerous categories of hacking tools. Clicking on any of those categories will reveal the tools available to us in each of those areas.
As you can see below, I clicked on the “Web Application Analysis” tab and it displayed the Kali tools available for web application analysis and hacking such as BurpSuite, sqlmap and wpscan.

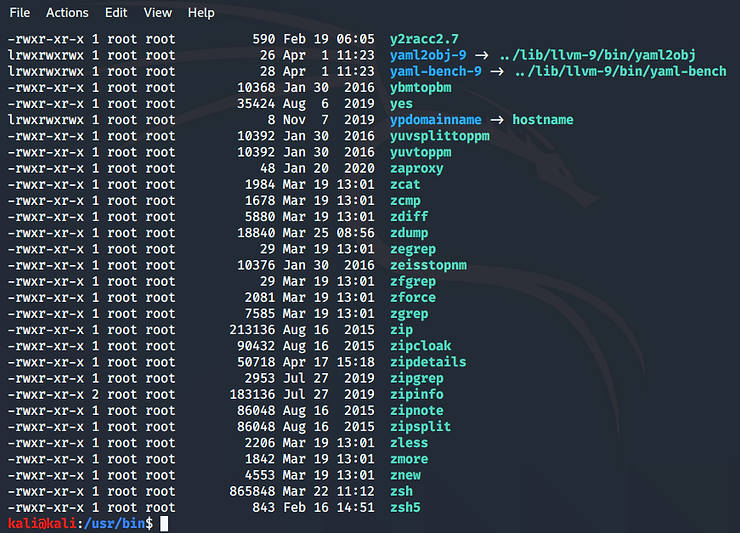
The tools will generally be run from the CLI or command line interface. Unlike earlier versions of Backtrack and other hacking distributions, Offensive Security has placed all the applications in the /usr/bin directory and since this directory is in our PATH variable, these applications can be run from any directory, making using Kali a bit simpler than BackTrack or other security distributions. If we navigate (cd) to /usr/bin and type ls -l, we can see displayed all of the applications available to us.

For those new to Linux and Kali, there are numerous commands that are useful. Probably the most important initially are the locate and find commands. Locate enables us to search through a database maintained by the operating system for the name of a particular file. So, if we were looking for the apache2.conf file, we could type
kali > locate apache2.conf
The locate command is fast and easy, but it can only find files that have been there at least 24 hours as the database is updated overnight on most systems. A file that you created a couple of hours ago, will not appear in the database until tomorrow.
While the locate command is fast, the find command is far more powerful. It enables us to find files by attributes and define where to look for them. For instance, if I wanted to find the same apache2.conf file, I could tell it to start looking in the /etc directory and look for a file (-type f) with the name (-name) apache2.conf
kali > sudo find /etc -type f -name apache2.conf
Where:
/etc is the directory to search in
-type f tells it to search for a file
-name tells find to search by name
apache2.conf is the name of the file to search for

After running this command, it comes back and tells us that apache2.conf is in the /etc/apache2 directory. The find command is a very powerful Linux command with almost innumerable switches and options to help us find files based upon various attributes such ownership, time, size, permissions, etc. It would be worth your time to explore further this command, but it is beyond the scope of our course.
Linux Services
With the arrival of Kali Linux 2020, this distribution of Linux has adopted the “new” systemd standard for system and service management. This is a significant change from earlier distributions of Kali but inline with changes throughout the industry that has widely adopted systemd.
Other services are available, but much be started via the command line interface (CLI). We can start and stop any service by typing;
kali > sudo systemctl <action:start,stop,restart><name of the service>
So, if I wanted to start the apache web server via the command line, it would be;
kali > sudo systemctl start apache2
If addition, apache2 has a control script named apache2ctl. We can use it to start and stop the apache web server.

Networking in Kali
Throughout this course, we will need to configure and reconfigure our network for optimal hacking. To do so we will need to be familiar with a few commands in Linux. The first and probably most important is ifconfig. It is very similar to windows ipconfig as it will reveal the requisite networking and interface information.
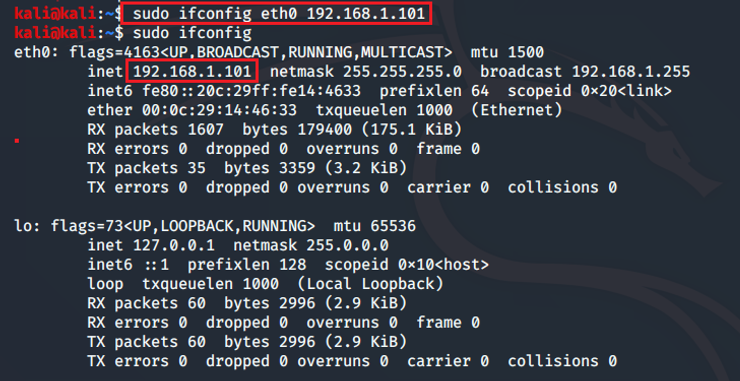
kali > sudo ifconfig

DHCP
To acquire a DHCP assigned IP address, simply use the dhclient command with the name of the interface, in this case eth0.
kali > sudo dhclient eth0
Setting a Static IP
To set a static IP, you can use the ifconfig as follows;
kali > sudo ifconfig eth0 <IP address>

For more on using Linux for hacking, check out my book “Linux Basics for Hackers” now available here on Amazon.


